Cleaning your vaporizer is crucial for maintaining its performance, flavor quality, and longevity. The process varies slightly depending on the type of vaporizer (dry herb, concentrate, or e-liquid), but here are general steps you can follow:
General Cleaning Steps:
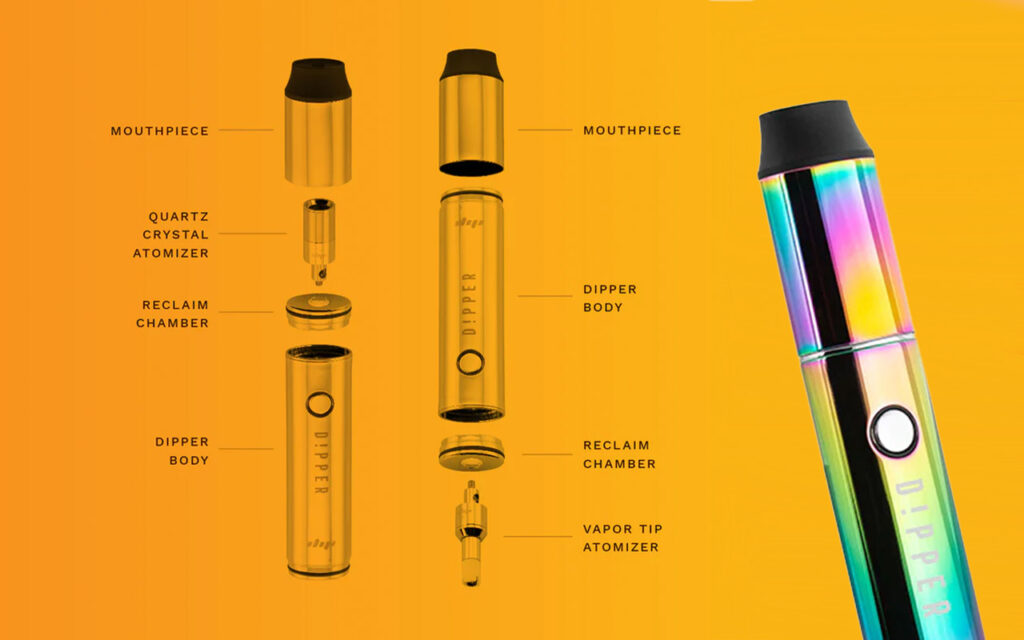
- Disassemble the Vaporizer:
- Turn off and cool down: Ensure the vaporizer is turned off and completely cooled before cleaning.
- Remove components: Disassemble the vaporizer by removing the mouthpiece, chamber, and any other detachable parts. Refer to the user manual for specific instructions.
- Empty the Chamber:
- For dry herb vaporizers, gently tap out any leftover herbs or use a small brush to clean out the chamber.
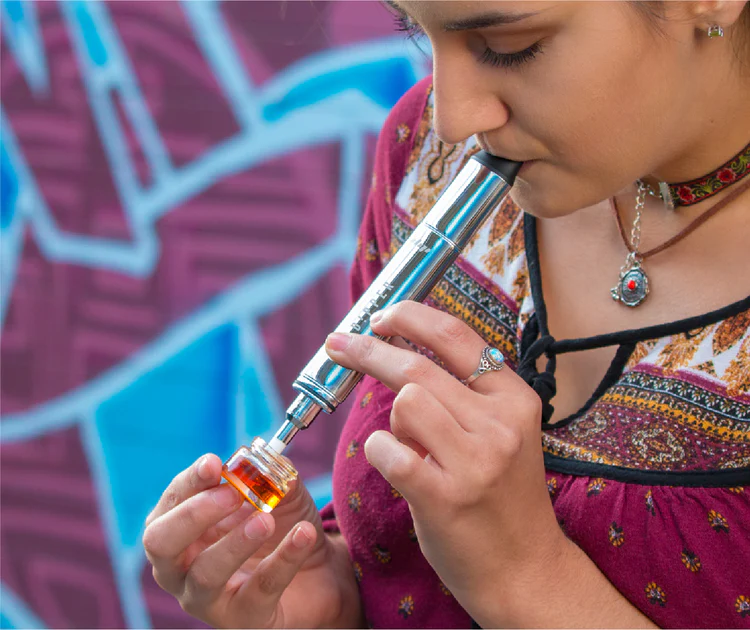
- For concentrate vaporizers, scrape off any residual wax or oil using a dab tool.
- For e-liquid vaporizers, pour out any remaining e-liquid from the tank.
- Soak Detachable Parts:
- Place the removable parts (like the mouthpiece and chamber) in a bowl of warm water mixed with a little bit of isopropyl alcohol (at least 90%).
- Let them soak for 20-30 minutes to loosen any residue.
- For deeper cleaning, use a cleaning solution designed for vaporizers or a mix of warm water and mild dish soap.
- Clean the Heating Chamber:
- Use a cotton swab dipped in isopropyl alcohol to gently wipe the inside of the heating chamber.
- Be careful not to over-saturate the chamber, especially if it has electrical components exposed.
- For e-liquid vaporizers, clean the tank thoroughly and ensure all e-liquid residue is removed.
- Clean the Mouthpiece:
- The mouthpiece can accumulate residue over time. After soaking, scrub it with a soft brush or a pipe cleaner to remove any buildup.
- Rinse it thoroughly with warm water and let it dry completely.
- Clean the Airpath:
- Use a small brush, pipe cleaner, or cotton swab to clean the airpath (the area through which the vapor travels).
- Ensure there’s no blockage that could affect airflow.
- Dry and Reassemble:
- Allow all components to air dry completely. Ensure no moisture remains, especially in the heating chamber or airpath.
- Once dry, reassemble the vaporizer.
- Perform a Quick Burn-Off:
- After reassembling, run a quick burn-off cycle by turning on the vaporizer and setting it to the highest temperature. This helps evaporate any remaining alcohol or water.
- Do this without loading any substance into the vaporizer.
Additional Tips:
- Regular Maintenance: To keep your vaporizer in top condition, perform a light cleaning after every few uses and a deep cleaning at least once a week, depending on how often you use it.
- Use Cleaning Tools: Many vaporizers come with cleaning brushes and tools. These are specifically designed to fit into small parts of your vaporizer, so use them regularly.
- Replace Parts as Needed: Over time, certain parts like the mouthpiece, screens, or coils may need to be replaced. Regular cleaning will help extend their life, but they are consumable parts.
By following these steps, you can ensure your vaporizer remains clean, providing you with a better flavor and a more enjoyable vaping experience.
If you don’t clean your vaporizer regularly, several negative consequences can occur, impacting both your vaping experience and the longevity of the device. Here’s what can happen:
1. Reduced Vapor Quality:
- Flavor Degradation: Residue buildup from herbs, concentrates, or e-liquids can alter the taste of your vapor, making it harsh, bitter, or unpleasant. Old, burnt material mixed with fresh substances will ruin the intended flavor.
- Poor Vapor Production: A clogged or dirty vaporizer can reduce vapor output, leading to weaker hits or less satisfying vapor clouds.
2. Clogging and Blockages:
- Airflow Issues: Residue can accumulate in the airpath, mouthpiece, or heating chamber, leading to restricted airflow. This makes it harder to inhale, reducing the overall effectiveness of the vaporizer.
- Malfunctioning Parts: In severe cases, clogs can prevent the device from working properly, causing malfunctions or even complete failure.
3. Decreased Efficiency:
- Uneven Heating: Residue buildup on the heating element or chamber walls can cause uneven heating, leading to waste of your material as it may not vaporize evenly. You might need to use more substance to get the same effect, reducing efficiency.
- Battery Strain: A dirty vaporizer can require the battery to work harder to produce vapor, leading to quicker battery drain and potentially shortening the battery’s lifespan.
4. Health Risks:
- Inhalation of Residue: If not cleaned regularly, the residue that builds up can start to burn rather than vaporize, leading to the inhalation of harmful byproducts or toxins.
- Bacterial Growth: Moisture and leftover material can create an environment conducive to bacterial or mold growth, especially in areas like the mouthpiece. This can lead to respiratory infections or other health issues.
5. Device Longevity:
- Wear and Tear: Dirt and residue can cause wear and tear on the device, leading to parts wearing out more quickly. This can result in more frequent replacements of components like screens, coils, or even the entire device.
- Permanent Damage: In extreme cases, the buildup can cause permanent damage to the vaporizer, leading to costly repairs or the need for a new device.
6. Unpleasant Odors:
- Lingering Smells: Residue from past sessions can leave a lingering odor in your vaporizer, which can be unpleasant when you’re trying to enjoy a fresh session.
7. Warranty Void:
- Manufacturer Issues: Many vaporizer warranties require regular maintenance and cleaning as part of their terms. Failure to clean your device might void the warranty, leaving you without recourse if the device fails.

So definitely clean your device, for your own health, the function of the device and your warranty.
If you have additional questions. Check the contact page on 420vaporizers.com. We will try our very best to answer your questions as soon as possible.